
Before we start, please note that this article is about how to find a leak in an ornamental pond made of EDPM liner that is 45mil or 60mil. We are not addressing concrete or mud bottom ponds in this article.
Let’s start by defining the different possible causes of the leak.
- A leak can be in the plumbing, a cracked or split pipe, or a loose or damaged fitting.
- The faceplates on certain kinds of skimmers and waterfall filters can be a source of a leak. We have run into this a lot in older Aquascapes units which at one time were sold with steel hardware (rather than stainless steel). Steel hardware eventually rusts away, allowing the faceplate to lose its seal. Fortunately, this is not true in more recent skimmers, and to our knowledge all skimmers we currently sell use stainless steel bolts and nuts.
- Probably the most frequent and common sort of leak is in a waterfall or stream bed returning water to a pond. Slanted rocks can channel water outside the boundaries of a rubber liner. Liner at the edge of a waterfall or stream can sink down or get pushed down and no longer be at the height needed to keep water within the stream or waterfall. This is the easiest form of leak to fix but it can be difficult to find.
- Sometimes rodents chew into the liner behind a rock in the waterfall.
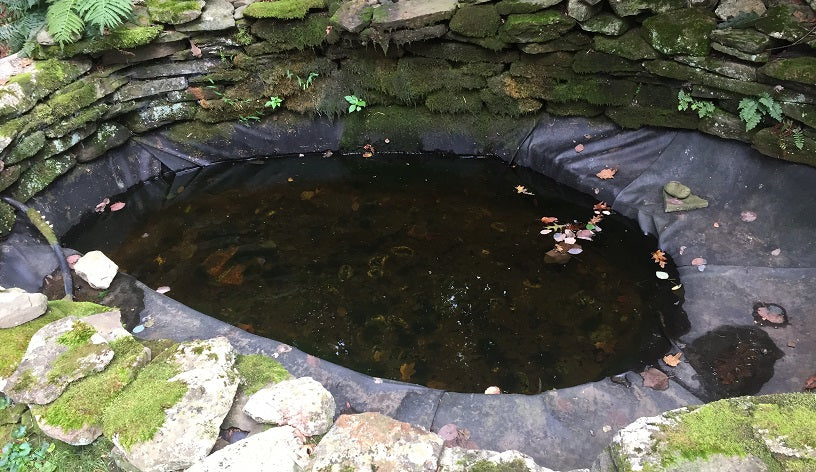
- A leak can be in the pond liner in the main pond itself. Most of the time leaks in the pond will come from a hole or puncture in the liner. In new ponds, they can be caused by a major stretch in the liner where there is not proper backing. If liners are stretched over a gap a stretch leak is possible if there is a void beneath the liner so that the weight of the pond water is creating serious pressure against the liner causing it to stretch so thin that it no longer holds water.
If this is all starting to sound a bit overwhelming, let’s break it down into small easier steps.
Determine the Location of the Leak
First, determine if the leak is in the pond or beyond the pond (in the plumbing, equipment, or waterfall). To do this you will need to take two 24-hour tests.
- The first test is to fill your operating pond to the proper level, mark or record that level in some definite way, and then come back 24 hours later and see if there is documented water loss.
- The second test is to turn off the circulation pump that is moving pond water through your plumbing and equipment, down the stream or waterfall and into the pond, and simply perform the same 24-hour leak test without the pond circulation running.
- NOTE: Before doing these tests, consider the safety of your fish. A small fish load in cooler weather may be fine while you test the pond for leaks for 24 hours. But in a heavily populated pond in hot weather, turning off the equipment could deprive your fish of oxygen, which could result in loss of fish. Consider adding aeration from an air pump or putting a small pump in the pond so that it is causing movement at the surface. This brings oxygen from the atmosphere into the water, minimizing the risk and allowing you to bypass the waterfall and plumbing relatively safely for 24 hours.
If your pond lost water during the first test, but not during the second test (where the pump and filtration were turned off), then your leak is not in the main pond liner. It may be in the waterfall, the plumbing, or in the equipment outside of the pond (such as a waterfall faceplate seal).
If your pond lost water during both tests, your leak is probably within the pond. It may be a hole in the liner or a leak in the plumbing or in the skimmer, at or below the pond’s normal water level.
The last thing to mention is this: always think about the conditions and situations that surrounded the time in which you first noticed the leak. Did you see anything that could correlate with the timing of the leak that might help you find it?
Finding a Leak Within the Pond
We will come back to what to do if your leak is in the plumbing, equipment, or waterfall, but let’s start with leaks in the main pond. If the water level dropped without the circulation pump running, your next test is to see how far down it will go. NOTE: to commit to letting it leak until it no longer leaks (which is essential to finding the hole), you must be prepared to remove your fish from the pond if necessary. This should be necessary only if the leak is on or near the bottom of the pond.
Perhaps the water will stop going down near the surface of the pond. When the water stops going down, check to see if the water level matches the mouth of the skimmer. If the water level is exactly at the mouth of the skimmer, there is a possibility the leak is in the plumbing just beyond the skimmer. If the water level matches the bottom of the faceplate on the skimmer the leak is probably in the faceplate — especially if you have a skimmer with steel screws that is about 8-10 years old.
If the water stops leaking anywhere below the skimmer mouth, the leak probably has nothing to do with the skimmer or plumbing, but now you know exactly at what level the leak is. You can now search the perimeter of the pond along this stable water level to locate the problem. Depending on where it is, you may be looking for low liner or for a hole in the liner. Unfortunately, there aren’t magic tricks for finding the hole. But we have narrowed down the search so that you know at what level to carefully look for it.
Finding a Leak Outside the Pond
Now let’s return to what to do if your pond water level only goes down when you're running the pump and waterfall. That means your leak is likely in your plumbing or somewhere on your waterfall.
You can rule in-or-out the plumbing by bypassing the plumbing. Disconnect the pump from the plumbing (cap the plumbing if possible and necessary). Then run a piece of tubing above ground from your pump to the waterfall box. Run the pond this way for a day. If the water level does not drop the leak is likely in your plumbing between the skimmer and the waterfall box.
If your leak persists even with alternative plumbing, start moving the bypass tube down the waterfall a few feet every day. When the leak stops you will know in which section of the waterfall a leak is located. Keep in mind that your pond may have more than one low spot in the liner or more than one hole.
After locating the leak, let’s move on to repairing the leak. The process of doing so will depend on the location of the leak.
Important Note for a Stretch Tear in the Pond Liner
If the leak is caused by liner being pushed down and stretched beyond its capacity, it will happen again unless you fortify the location where the stretch happened. Raise the liner up and reinforce behind the low spot with rocks or well-packed soil. Then proceed with the process described below.
Repairing a Tear in the Pond Liner
To repair a hole in 45mil or 60mil EPDM rubber liner, clean the area thoroughly without using detergents. For cleaning serious debris, we use a rag and if we need an abrasive cleaner, we use non-iodized salt. Then we do a finer cleaning with rubbing alcohol, which will evaporate away.
Once the area is clean, it must also be very dry. In direct sunlight on a hot day, it is not difficult to dry a black rubber liner. But if its cloudy, shaded, or cold, we use a hair dryer to make sure it is dry. NOTE: Standard warnings about using an electric appliance near water apply here!
Always work on a flat surface, even if you must move rocks to get enough slack to make that possible. We try to put a board under the area we are trying to patch so that we have a flat, hard surface on which to work.
Next, apply a thin coating of the proper primer to go with the patch you are using. A great patch that we often use is Cover Tape. While usually used for seaming two pieces of liner together, this 6” wide tape is sticky on one side, and it makes a great patch.
Once the primer is tacky (which may only take a minute, depending on the weather), peel the backing off the patch or cover tape and lay it flat over the hole. Working from the middle of the patch out to the edges, push out all the air bubbles and press the patch onto the liner until you have a great seal. We use a little wooden or plastic roller to do this. These come with many of our patch kits. Make sure the edges are pushed down especially well.
Wait at least fifteen minutes before getting this patch wet. If you used a quality primer and patch and have applied it properly, this patch will last as long as the liner itself.
Repairing a Crack in the Tubing
If you have tubing that is split or leaking, the best thing to do is to get a piece of tubing to replace the bad area. It is relatively simple to splice in a new piece using a pair of couplers.
Repairing a Leak in Equipment
If your skimmer or waterfall filter faceplate is leaking, we can provide instructions about that too. That will vary greatly based on the exact equipment that is leaking, so contact us for help with those details.
Conclusion
All ponds will lose some water due to evaporation — and it will evaporate faster when the weather is hot or when you have waterfalls or other moving water features. But significant water loss can be prevented so that your water feature is again a relaxing and enjoyable source of inspiration. Just about everyone enjoys the sights and sounds of moving water and the wildlife water supports.